Repotting Orchids: Step-by-Step Instructions
Introduction
Repotting orchids is one of the most important aspects of successful orchid care. Unlike many common houseplants, orchids grow in specialized potting mixes that decompose over time, affecting root health and overall plant vitality. Knowing when and how to repot orchids can make the difference between a thriving plant that produces stunning blooms and one that struggles to survive. For many beginners, the process may seem intimidating, but with the right tools, timing, and technique, repotting orchids can be straightforward and rewarding. In this guide, we will walk you through everything you need to know—from understanding why repotting is necessary, to preparing your materials, and finally, to carrying out the repotting step by step.
Why Repotting Orchids is Important
Repotting orchids serves several purposes that are essential for maintaining plant health and encouraging consistent flowering. Over time, orchid potting media such as bark, sphagnum moss, or coconut husk breaks down. As it decomposes, it loses its ability to drain properly, retains too much moisture, and limits airflow around the roots. Orchids, particularly epiphytic types like Phalaenopsis and Cattleya, require excellent aeration and do not tolerate soggy conditions. Without repotting, decomposed media may lead to root rot, pests, or fungal infections. Repotting also provides an opportunity to remove damaged roots, refresh the plant’s environment, and give it room to grow. Additionally, orchids tend to outgrow their pots, and when roots spill over the edges or form dense clusters, the plant struggles to absorb enough nutrients and water. By repotting, you are essentially resetting the orchid’s growing conditions, ensuring it continues to develop strong roots and produce healthy leaves and flowers.
When to Repot Orchids
The timing of repotting is critical for orchid health. The best time to repot is typically right after the orchid has finished blooming, when it enters its active growth phase. During this time, new roots begin to emerge, and the plant adapts more easily to its refreshed environment. Avoid repotting orchids in full bloom, as the stress may cause flowers to wilt prematurely. Most orchids require repotting every one to two years, depending on the type of potting mix used and the speed of its decomposition. Some clear signs that an orchid needs repotting include: roots spilling out of the pot, a foul smell from the potting mix, soggy or compacted media, or roots turning brown and mushy. By paying attention to these signals, you can repot at the right time, minimizing stress and promoting long-term growth.
Step-by-Step Guide to Repotting Orchids
Step 1: Gather Your Materials
Before starting, prepare all necessary materials to ensure the process goes smoothly. You will need:
- A new pot (preferably transparent plastic or terracotta with drainage holes)
- Fresh orchid potting mix (bark, sphagnum moss, or a specialized blend)
- Sterilized scissors or pruning shears
- Gloves (to protect hands from sharp tools or fungal spores)
- A clean working surface
Having everything ready prevents interruptions and reduces the time the orchid spends outside its pot. Beginners often underestimate the importance of clean tools and fresh media, but both are crucial for preventing infections. Always sterilize scissors with rubbing alcohol or boiling water before cutting roots, and never reuse old potting mix. Preparing thoroughly sets the stage for a stress-free repotting experience.
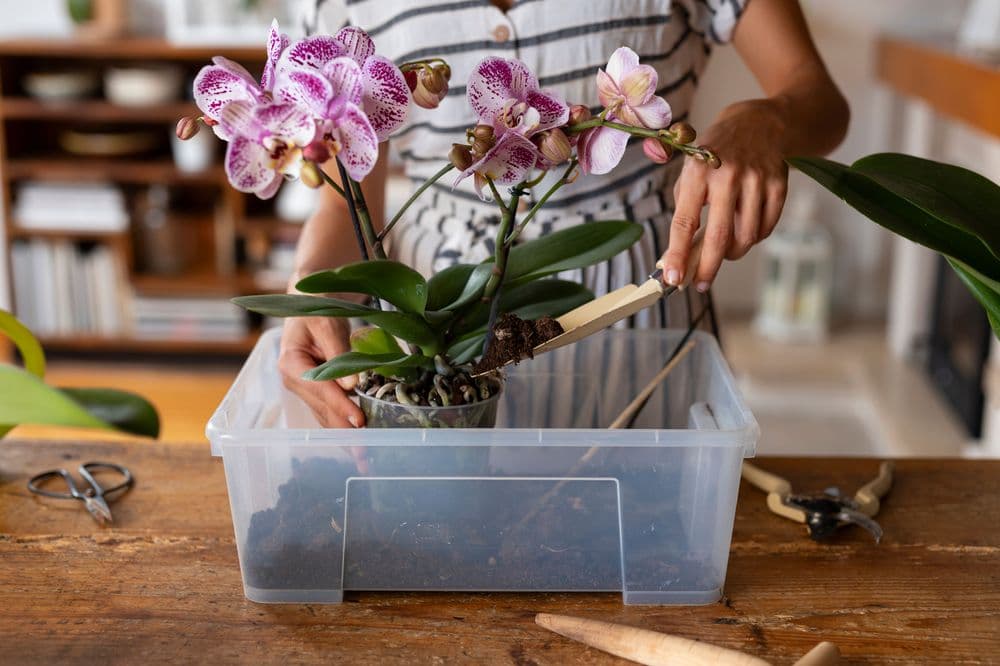
Step 2: Remove the Orchid from Its Pot
Carefully remove the orchid from its old pot, gently squeezing or tapping the container if necessary. Transparent plastic pots can often be flexed to release the root system. For stubborn cases, you may need to cut the pot away rather than risk damaging the roots. Once removed, gently shake or rinse away the old potting media, being mindful not to break healthy roots. This step allows you to clearly assess the condition of the root system and determine what needs trimming. Beginners should remember that orchid roots are more fragile when dry, so it may help to soak the pot briefly in water before removal to soften the roots and make them more pliable.
Step 3: Inspect and Trim the Roots
With the roots exposed, examine them carefully. Healthy orchid roots should be firm and green or silvery in color, while dead or rotting roots appear brown, mushy, or hollow. Using sterilized scissors, trim away all damaged or unhealthy roots. This prevents the spread of rot and frees up space for new growth. Do not be alarmed if a significant number of roots need trimming—orchids are resilient and will often bounce back quickly. However, avoid cutting healthy roots, as these are essential for nutrient absorption. If you notice pests or fungal growth, consider applying a gentle fungicide or rinsing the roots with lukewarm water before repotting.
Step 4: Position the Orchid in Its New Pot
Place the orchid into its new pot, positioning it so that the base of the plant sits just below the rim. Ensure new root tips have enough room to spread. Hold the plant steady with one hand while filling the pot with fresh orchid mix using the other. Gently shake or tap the pot to settle the mix around the roots, but avoid pressing down too firmly. Orchids prefer loose, airy media that allows proper airflow. If the orchid seems unstable, insert a support stake to keep it upright until the roots establish themselves. Beginners often make the mistake of burying the orchid too deeply; always keep the crown above the mix to prevent rot.
Step 5: Watering and Aftercare
After repotting, water the orchid lightly to help settle the new medium around the roots. Avoid overwatering at this stage, as trimmed roots are more susceptible to rot. Place the orchid in a bright location with indirect light, and allow it time to recover from repotting stress. Do not fertilize immediately; wait at least two weeks to give the roots time to adjust. During the first few weeks, monitor the plant closely, watching for signs of new growth or stress. It is normal for orchids to appear slightly droopy after repotting, but with proper care, they usually rebound quickly. Be patient—repotting sets the stage for stronger root systems and more reliable blooms in the future.
Common Mistakes to Avoid
Even experienced growers sometimes make errors during repotting. Here are some of the most common mistakes:
- Using the wrong potting mix: Ordinary potting soil retains too much water and suffocates roots. Always use orchid-specific media.
- Overpacking the pot: Pressing the mix too tightly reduces aeration and leads to root suffocation.
- Repotting too frequently: While necessary, repotting too often causes unnecessary stress. Stick to every 1–2 years unless urgent issues arise.
- Burying the crown: This can lead to crown rot and plant death. Always keep the crown above the medium.
- Watering too much immediately after repotting: Roots are sensitive and need time to heal before being exposed to heavy moisture.
By avoiding these pitfalls, you give your orchid the best chance at a healthy recovery.
Tips for Beginners
- Choose a clear plastic pot to monitor root health and moisture levels.
- Repot on a clean surface to reduce the risk of introducing pests or diseases.
- If unsure about trimming, only remove roots that are clearly rotten.
- Keep a regular repotting schedule to prevent emergencies caused by decayed media.
- Remember that orchids are adaptable—don’t worry if your first repot isn’t perfect.
Conclusion
Repotting orchids may seem daunting at first, but it is a vital practice that ensures long-term health, vibrant foliage, and stunning blooms. By understanding why repotting is important, learning the correct timing, and following clear step-by-step instructions, even beginners can succeed in giving their orchids the fresh start they need. While mistakes are common, they also provide valuable learning experiences. With patience, practice, and consistent care, your orchids will reward you with resilience, growth, and beauty year after year. Repotting is not just about maintenance—it is an opportunity to strengthen your connection with these fascinating plants and ensure their continued success in your home.